Bird Quilt Tutorial
First and foremost, I want to give credit where credit is due. I never would have made this quilt if I had not found it on the Joann Fabrics website. However, many people didn’t give it a chance because it is missing information, and the directions are vague. I am writing this tutorial for the sheer enjoyment of helping others. I hope it will inspire others to make a bird quilt.
If you would like the Joann pattern, you can download it here.
Download my tutorial pdf version here.
SUPPLIES & TOOLS (scroll down to bottom to see which fabric I used):
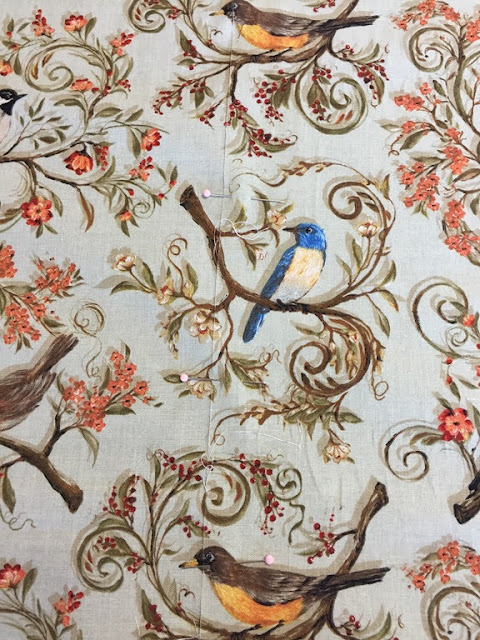
- (A) 2/3 yd Nestled in the Branches Square Blocks fabric (more if you want a larger variety of colors)
- 3/8 yd of 4 fabrics for sashing (Shown as (C)Green, (D) Red, (E)Yellow, and (F) Blue
- (B) 2 1/3 yards for 5” border*
- (G) 3/8 yard for border around each block (Shown as Purple)
- (H) 1/4 yard fabric for second border (Shown as Gray)
- 1/2 yard for binding
- 3 2/3 yards for backing*
- 55"x68" batting (or twin size package)
- Sewing machine
- Basic sewing supplies
*If using same fabric for backing as the 5” border, you will need a total of 4 yards.
1/4" seam allowance used.
CUTTING:
Keep in mind while using fabric that is directional, you will have to be sure to cut the right direction, especially with the side and top/bottom borders and the backing.
12 – 7.5" center blocks
12 each of 4 fabrics for sashing (Cut 12 strips that are 13.5” wide by 2.5” tall. You will have a total of 48 strips.)
5 – 1.25”xWOF for top/bottom block borders
6 – 1.5”xWOF for side block borders
5 strips 1.5”xWOF for second border
2 – 5.5"x40” wide for top and bottom borders
2 – 5.5"x64” long for side borders
6 – 2-1/2"xWOF for binding
2 – 28” wide by 68” long for backing (you may need a little more if you are matching designs)
DIRECTIONS:
1. Cut out the bird blocks in between the red border.
You will need 12 blocks in your choice of colors. I chose 3 Purple, 4 Blue, 3 Tan, and 2 Brown. I had to use more yardage to get the selection that I did.
2. Cut the strips of fabric for the borders and sashing.
(For each step after sewing, I like to press, and trim them up to make them square.)
1. For each block, sew 1.25” border to top and bottom, press, then sew 1.5” border to sides, press. Use the block line as a guide. Trim. The square will now be 9x9”
3. MITERED CORNERS
For each block, mark 1/4” from each corner.
5. Repeat with remaining squares, making a total of twelve 13" squares.
6. Sew squares together. Press.
7. Sew second border onto top and bottom then onto the sides. Press.
8. Sew 5” border onto top and bottom then onto the sides.
9. Sew backing together into a 55.5”x68” piece. Press seam open.
***Since I used the same fabric for the backing as I did for the 5” border, I used the same pieces of 68” fabric. I cut 5.5” off each side of one of the pieces.
To match design, line up the two pieces of backing, face up. Pin.
Draw a line with disappearing ink. Remove the top piece of fabric (my top piece was on the right), and draw another line (using a ruler) 1/2” to the right of the first line. Flip the top piece over, rights sides together, lining up the fabric with the line. Fold top piece over 1/4”, matching up the design. Press. Pin.
Follow the fold from your pressed line as a guide to sew. Press.
10. Sandwich batting between backing and quilt front.
First lay down the backing, face down. Then, roll the batting, using a dowal, pool noodle, or empty home dec cardboard roll (or whatever you can find that is long enough). Using basting spray (I use 505), spray about a foot down, across entire width of backing. Lay the batting down where you’ve sprayed, and unroll 1 foot. Continue this way until it is all unrolled, smoothing it as you go.
Do the same with the top of the quilt, making sure it is face up.
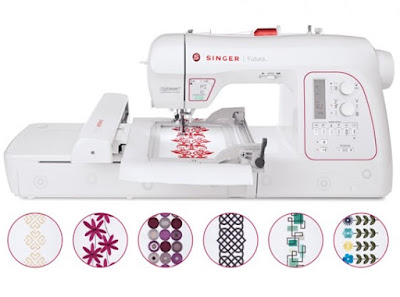
11. Quilt as desired. (I used “A Bird is the Word Feather Quilting Design Pack” from emblibrary.com. I used Sulky invisible thread so that it wouldn’t take away from the design of the fabric. Once I was finished, I thought if I could do it again, I would just stitch in the ditch. The quilting took away from some of the beauty of the fabric.)
12. Sew binding strips together, press seams open, and fold in half lengthwise. (video on binding.)
13. Sew binding to outer edge of quilt using a 3/8" seam.
14. Turn binding to back and slip stitch along seam line.
FABRIC USED (All from Joann Fabrics):
A - Nestled in the Branches Square Blocks* $9.99/yd (Bought from a friend. I think I paid $2 for 2 yards.)
B and Backing- Nestled in the Branches Bird Scenic* $9.99/yd (Paid $44.57 for 8 yards on ebay—$5.57/yd—used 4 yards)
C - Legacy Studio™ Batik Cotton Fabric 43"-Floral $12.99/yd (Used a 60% off coupon—$1.94 for 3/8 yd)
D – Nestled in the Branches Swirl Vine* $9.99/yd (bought on ebay with other fabric, came out to $2.88 for 3/8 yd)
E - Legacy Studio™ Indonesian Batiks - Pewter $12.99/yd (Used a 60% off coupon—$1.94 for 3/8 yd)
F - Legacy Studio™ Cotton Fabric 44''-Chocolate Scroll on Batik $12.99/yd (Used a 60% off coupon—$1.94 for 3/8 yd)
G – Keepsake Calico Cotton Fabric TAIH Tonal BLNDR DRK RED $7.99/yd (paid $3.83/yd on sale and bonus discount)
H and Binding - Keepsake Calico™ Cotton Fabric 44''-Olive Tonal $7.99/yd (paid $3.83/yd on sale and bonus discount)
(Total spent $40 on fabric)
* (no longer available but can often be found for sale on ebay.)
Batting – Warm and Natural $29.99 (paid $15)
Sulky Invisible Thread – $8.99 (used 50% coupon – $4.49)
Grand total spent on this quilt: $60. What I would have spent on at full retail price: $124.
Lessons I’ve learned from this quilt:
This is the first time I used the invisible thread for quilting (both in the bobbin and on top)—Sulky Invisible thread, 2200 yards, with over 111,000 stitches, and still have some left. I must say, I LOVE it! Thread tangled maybe twice during the entire time. I had to change out the bobbin twice. I love how I can mess up and it doesn’t really show. I used a #14 embroidery needle, but it left pretty big holes in each stitch, so maybe a smaller one would be better.
I found the best way to quilt on an embroidery machine is to start from the top right, and go straight down, then back up to the next column and continue about halfway, then flip the quilt over, flip the design over, and start in the same manner upside down. When I got to the center, it was really heavy and started shifting the design because the “carriage” could not carry the weight. Using a template is a must, to properly line up the design. I print the template of the design onto an overhead projector sheet (clear sheet). I think the design I chose was too dense (1549 stitches in a 6.15” square). I should either use one that is not as dense, or just stitch in the ditch to save the beautiful designs of the fabric.
Also if I were to do this quilt again, I think I should play around with the different fabrics to make a little different design.
I worked on the quilt (cutting, sewing) for about 12 hours. Quilting on my embroidery machine took 15 hours. Cutting, stitching, and hand-stitching the binding took 9 hours. In all, I spent about 33 hours on it.
I hope you’ve enjoyed this tutorial!
%5B1%5D.jpg)


