Kitchen Remodel - Our Version of Love It or List It
We bought our home 11 years ago, with the idea of adding on and remodeling it. It was exactly what we were looking for (big yard, just outside city limits and within our price range). Although it was really small, it had a lot of potential.
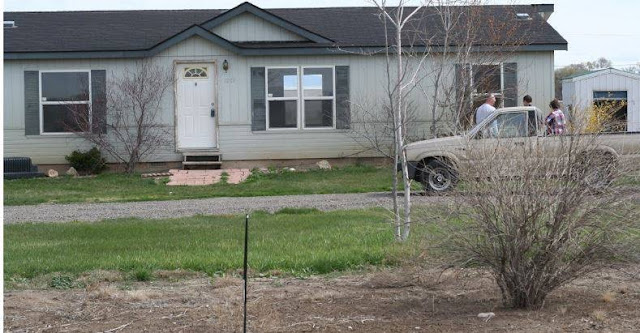
We fixed it up on the outside over the years. Put in a bay window, built a front deck, pulled off the shutters, gave it a paint job, did some landscaping, etc.
But the kitchen was always something we really wanted to change. The design is called a “galley kitchen,” which sounds fancy, but it’s just two parallel walls with a small walkway between each side. With it being only 8x10 feet, it made for a small kitchen.
Old Kitchen
The Plan
It wasn’t difficult to figure out the new design of the kitchen. We wanted an open concept design, but we were limited to what we could do, due to the furnace and breaker box (circut panel) being on the end of the kitchen.
We budgeted about $3,000 which included all new cabinets, tile backsplash, a new range and over-the-range microwave, flooring, wall paint, cabinet paint, and formica.
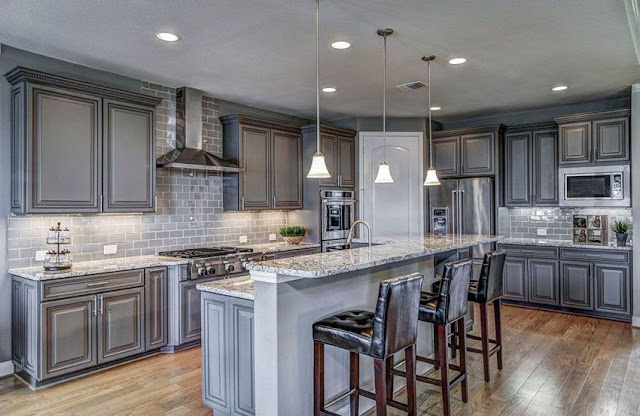
This is the kitchen that inspired me:
I loved the brick and the gray tones. Although our kitchen wasn’t as big and didn’t have the same layout, we could still get “that look.”
Demo Day
Demo day was easy. We started by taking down the middle wall between the kitchen and the living room, and the half wall between the kitchen and the dining room.
The kitchen had the original vinyl paneling on the walls, so my husband took it all off and put up sheet rock, tape and texture ($175).
Problems and Extra Expenses Not Accounted For
Fridge
We ran into a problem with our large fridge. It stuck out 6 inches past the opening to the laundry room, leaving only about 28 inches between the fridge and stove. So we had to buy a smaller fridge. My husband about cried when we sold it (he still does, once in a while). He loved that fridge. (We sold our fridge for about the same price that we bought the new one, so that was a wash.)
Island
We wanted a big island. My husband made the island by putting together two 30” base cabinets and wrapping it with strand board and 2x4’s. The end size is 3x5 foot. We turned the fridge 90 degrees so that it faced out instead of towards the range. We always wanted a pantry, so we put two large pantry cabinets by the fridge.
Also, we added a brick panel ($60 for two) to the island, which I painted, so that was another $20 for paint. So the island cost about $175 more than what was budgeted.
First I painted the red brick with a flat Dark Ash (Behr) paint. Then I took a round chalk paint brush and dabbed it in flat white and dotted it all over the brick. I went back and forth with dipping it in white and dark ash and black to get it a multidimensional look. I dabbed a few bricks darker and a few lighter.
Flooring
We ordered online from Home depot the flooring. It was Khaki Oak Dark 6 in. x 36 in. Luxury Vinyl Plank Flooring by TrafficMASTER. It is supposed to be very risiliant. However, it scratches VERY easily! The first day we installed it, when we put the fridge back, it scratched it up. Then the chairs from the new tableset scratched it up. Luckily, I had some antiqueing wax that I purchased at Joann Fabrics that I rubbed into it with a rag. The scratches disappeared. Then I put felt on the bottom of each chair leg and table leg.
Miscellaneous Costs
Then my husband wanted a certain style for the sink, so he bought a new sink. It was $366. Our old faucet was ok, but it was so gunked up with hard water, we decided to get a new one ($98). We also bought a filter for under the sink ($63), and the plumbing and strainers ($63).
We also didn’t account for the outer panels of the cabinets, and the toe kicks. That was over $100. The particle boards ($20) for the countertops weren’t included in the budget, either. We also had to buy things for the microwave vent and for moving the floor vent to the new island (about $75), electrical stuff (over $200), and a bunch of miscellaneous (over $500) . And of course all the tools to make things easier (over $600). We didn’t account for all the eating out (over $700) and microwave dinners, either. That really added up. We also had to buy trim (molding) for the island and bottom of the base cabinets, so that was about $140. Knobs and handles (pulls) were about $65 at Walmart.
First we bought 5 gallons of paint ($150), but ended up needing more, so we bought 2 more gallons, which were $30 each at Home Depot. Didn’t realize paint was so expensive, so after that, I started buying it at Walmart.
Then we thought that if everything in the kitchen was new, and new flooring, the ugly old brown carpet in the living room needed changed—another $1,000 for carpet. We went with one called “Toasted Coconut.” It reminds me of salt and pepper.
We also put in new lighting (took out 3 ugly old lights, and put in 12 dimmable flat panel lights. With all the wire, ceiling boxes, and new switches, it cost nearly $300.
Then we decided that our huge orange-brown sectional needed to go because it wouldn’t match the color scheme, and it was so big, it didn’t look good in our small living room anyway—another $2,200 for two really nice power reclining leather sofas.
Old sectional:
New sofas:
Then we decided that our big round dining room table needed changed out, too—another $400 for a table set.
Old table set:
(Yes, that is carpet in the dining room.)
New table set:
Soooooo…… for about $10,000 (not including eating out and microwave dinners, but including the new furniture) and 30 trips to Home Depot, we got a new kitchen, living room, and dining room. So I guess whatever we budget, we need to expect about four times more.
Since we started the remodel the day after Thanksgiving, all the big things (appliances and furniture) were on sale. We saved $2,000. And since we did everything ourselves, we saved thousands more.
Color Scheme
Watching a lot of “Fixer Upper,” I really liked the colors that Joanna Gaines chose. So I googled her go-to color and found Silver Strand by Sherwin Williams.
I really like this color. Depending on the lighting and surroundings, sometimes it looks gray, other times it looks blue, and other times it looks teal. It is a very versatile color. It really brightened up the rooms, too. The colors we had before were Dapper Tan by Glidden and a dark brown color.
Cabinets
For the cabinets, I went to Home Depot four different times to get the right color. First I was going to choose “winter fog” because on the box, it looks like a gray color. But after looking up images online of others using this color, it is more like a pink color.
So I went with Frost:
And it was WAY too light. It is pretty much a white color.
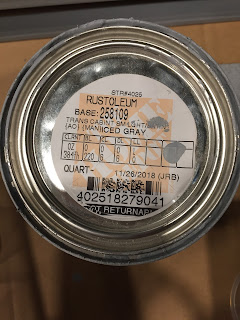
The second time I went to Home Depot, I chose “Iced Gray” from the Transformations Kit. So from the already tinted “Frost,” the paint mixer added 100 black and put in some color to cancel out another color. I went home, colored a cabinet, and still felt it was too light.
So I went back for a third time and asked to add 100 more black. He said it would be the last time he could add color, since if you get too much ink, the paint will not stick. When I went home and painted a cabinet door, I still felt it was too light.
There wasn’t much of a difference between Iced Gray and adding 100 black.
So I decided to track down where the image of the kitchen I liked came from, which was a home builders website. I called them and asked what color the cabinets were. I was told “Slate.” So the fourth time going to Home Depot, I asked for Slate and they had Slate Gray, so I got a sample of Slate Gray and a sample of Dark Ash..
And of course these were way too dark. So I stuck with the Iced Gray w/+100 black. Also, the samples that I bought were very shiny. They were what Home Depot recommends for cabinets. The paint even started to come off the cabinets. It didn’t go on smooth, either. So you could see streaks. I painted them on our super old MDF cabinets that are made of particle board and covered with a veneer. I sanded them lightly before painting. I didn’t have any problems with the Rustoleum base coat.
The base paint from the Transformations Kit went on really smooth. I put it on very lightly each time, using sponge brushes. Our old cabinets that we kept were made of oak, and we had stained and varnished them. I sanded them down and used the deglosser from the kit before painting. The only downfall with oak, is you could see every little grain, so I had to give it 3 coats.
The new cabinets were beech unstained. They needed sanded down a bit because they were rough in some places. But the paint went on a lot more uniform and I only had to give it 2 coats. If you want to see the grain, go with oak. If you don’t want to see the grain, go with beech wood.
The top coat went on pretty smooth, too, as long as I used thin coats. After drying, it has a really nice satin finish—so smooth and beautiful. Many reviews say that it streaks a lot and dries really fast. I used sponge brushes for both base coat and top coat and had no problem with streaks. I also put it on very lightly. I also did not use the glaze, as it made it look dirty. I prefer the clean look.
Time Frame
We spent 5 1/2 weeks on this remodel. That is working on it after work and on weekends, but mostly weekends. I am so silly to have thought it would only take a weekend. My husband said, “I have four days off for Thanksgiving, so I’m going to remodel the kitchen.” I thought he meant it would only take 4 days. What did I know? I had never done anything like this before. If my husband and I both would have taken off three weeks of work, we probably would have had it all done in three weeks, working every day and not having to wait for orders to come in.
Day 1: Demo Day
Day 2-4: Electrical, sheetrock, tape and texture, paint
Day 5-9: Installed cabinets, odds and ends
Day 10: Built island
Day 11-12: Built countertops and put on formica.
Day 13-17: Installed microwave, island vent, took out old flooring, painted
Day 18: Installed new flooring
Day 19: New carpet
Day 20-26: Took a break, I painted the brick panels for the island (lots of experimenting!)
Day 27-28: Installed lighting and brick paneling on the island
Day 29-33 : painted cabinets (Ugh! It took so long because we didn’t have much space to paint them, and we had to wait in between each coat.)
Months later, we got the cabinets done and the tile. The tile took about 3 days to put up, working in small sections (about 18”x24” sections) at a time. The grout took a day. We had to spend another $115.
Oh, and we had to redo one of the cabinets because it left too large of a gap between the range and the counters, so that was another $25.
So, just for the kitchen remodel alone, not including the furniture, but including all new flooring, it cost about $6,500.
Before and After Photos
Before:
After (still not quite done!):
What I Learned
If we could go back and do it over, I would definitely change the order in which we did things. For instance, the lighting would have been before putting in the new flooring. It made such a mess cutting holes in the ceiling as insulation fell out, and filling, mudding, and sanding the holes from the old lights. I would have saved the flooring for last.
Had I known how long it would take, I would have planned meals for every day, so that we didn’t need to eat out all the time. That would have saved us hundreds of dollars. We would have had a lot of soup and sandwiches.
Also, I would have definitely taken lots of before pictures! The only before pictures we have of the living room and dining room are the ones that our appraiser took when we refinanced the house a couple years ago.
When we took out the old carpet, there was so much dust underneath it. I couldn’t believe how much dust! And there were stains all over the wood from where things had been spilled and dogs had used the carpet as a toilet. We no longer have dogs for that very reason. Lifting up the old carpet and padding, it smelled so bad. After removing the carpet and installing all new flooring, I immediately noticed a difference. I have a super strong sense of smell and every time we went somewhere and came back home, when walking into the house, I always noticed a certain smell. I thought it was dirty laundry and dishes that I was smelling, but now I know that it was the carpet. All I smell now when I walk in the house is new carpet and paint. Now I know why Joanna Gaines likes wood flooring so much. Carpet is really dirty.
I’ve told my husband time and time again throughout this remodel that I wished we would have done this when we first moved here, but I only started watching “Fixer Upper” and “Love it or List it” these past few months. I used to like browns and greens, but after watching these shows, my taste changed to grays. Had we done this when we first moved here, there would have been a lot of browns and greens, so we would have ended up remodeling it again anyway.
When I look at all we’ve done, I am just amazed that this is even the same house. I feel like I’m in another house. All the years we have lived here, I never had dreams about this house, yet the other night I actually dreamt about this house. It was a really nice feeling, like this is home now. Before, I just felt like this was a house we settled on and it was temporary. It’s funny because before this remodel, I really wanted to move. I kept telling my husband we should move because I wasn’t happy here. We started looking at new houses, and my husband was all ready to move after seeing some amazing kitchens. He was more anxious to move than I was! Now that we’ve remodeled the kitchen, he and I both love it enough to stay. Now if only I had my own sewing room. . . .


.jpg)


