How to Make a Pellon Sample Ring
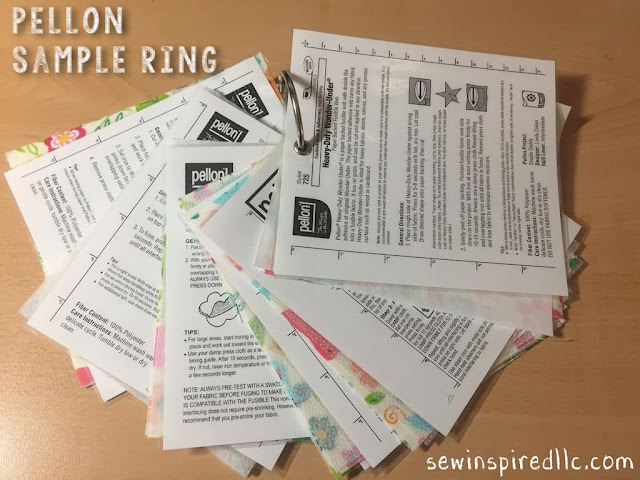
If you’re like me and never know which Pellon interfacing to use for a certain project, this nifty sample ring just might be the answer. I noticed that there is one at Joann’s Fabrics, hanging on the Pellon rack. I searched online for one and couldn’t find one. I was even willing to buy one. Alas, I decided to make one myself. It was really simple.
Materials you’ll need:
- Heavy-weight copy paper, or light-weight cardstock
- Duck Peel & Stick Clear Laminate
- Fabric scraps
- Interfacing of your choice
- 3/16” Eyelets
- Book Ring
- Computer and Printer
- Paper Trimmer
- Rotary Cutter, Mat, and Ruler
- Eyelet Plyers
- Awl
I trimmed the pages so that they would all be 4.5” wide, by 5” tall. I then covered them, both front and back with Duck Peel & Stick Clear Laminate that I purchased at Walmart. (This is the only one I have found that is truly clear, just like the laminating sheets.) I used my trimmer and gave them a 1/8” border all around them.
Then I cut two squares out of each interfacing, and squares out of fabric. (I only cut one from the flex foam and Peltex since they are very thick.) I ironed a piece of fabric on one of each kind of interfacing. This is so that I can see how the interfacing looks without fabric, and with fabric. Then when I have interfacing without a label, I can easily go to my sample ring and see which interfacing it is. And I can see how stiff it will be on fabric, so I can choose the right interfacing for the project.
Then I measured and marked the center, about 3/8” from the edge of the laminate and used my Eyelet Plyers (with the die base and cone punch in place) to punch a hole in it.
I used that hole as a guide, and punched a hole in each sheet, interfacing, and fabric.
Then I made a sandwich with the directions sheet on top, interfacing in the middle, and fabric with interfacing on the bottom. I placed the eyelet on an awl and slipped it through the hole. The awl makes it go into the eyelet easily.
Then I used my Eyelet Plyers (with the splitting punch and holder in place) to crimp the eyelet. *Make sure you follow the directions. My plyers have a plastic piece that is supposed to be flush with the top (front) of the eyelet. Putting it on the bottom (backside) causes the metal from the eyelet to go into the plastic.
Then I put them all on a Book Ring. Now I can easily go through it and pick out the right interfacing. And it will be easily enough to add more.


