Using PhotoShop for Designing a Quilt
I often find fabric that I really like and I just can’t seem to picture how it would look in a quilt. I have searched for quilting software that could easily drag photos of fabric into the blocks to see what it would look like, but only found really expensive software. I decided to use PhotoShop.
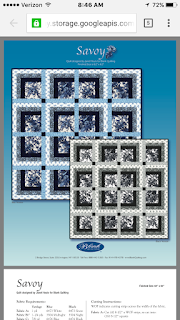
I found a quilt pattern that I really like by Janet Houts, found on Bear Creek Quilting Company, called Savoy.
First I saved the pdf of the pattern (link here.)
Then I opened the pdf in Photoshop and cropped the picture of the layout of the quilt.
I found a quilt pattern that I really like by Janet Houts, found on Bear Creek Quilting Company, called Savoy.
First I saved the pdf of the pattern (link here.)
Then I opened the pdf in Photoshop and cropped the picture of the layout of the quilt.
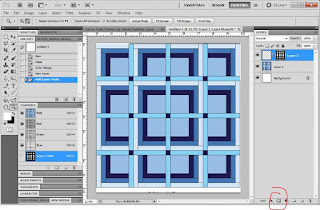
Then click on “Select” then “Color Range” and click on a color. Make sure that the “fuzziness” is set to zero so that it only selects that color. This will only work if you have solid colors for each fabric selection in your image.
Then I created a new layer, and selected “add vector mask.” It should automatically make a mask of the color you selected. Continue to do this with each different color. Then once you have them all finished, you can start adding your fabric to the quilt.
I found all my fabric at Jo-Ann Fabric, then went to the website, joann.com, and searched for the fabric. Once I found it, I saved the image of the fabric by right-clicking the image and clicking “Save Image As.”
Once I had all my fabric saved, I opened the files in PhotoShop. If the image was purely fabric and didn’t have anything else surrounding it, like a measuring tape or white space, then I simply clicked “Edit” then “Define Pattern” and “Ok.” If there was something else in the picture, I used the Rectangular Marquee Tool to select just the fabric, then the above steps.
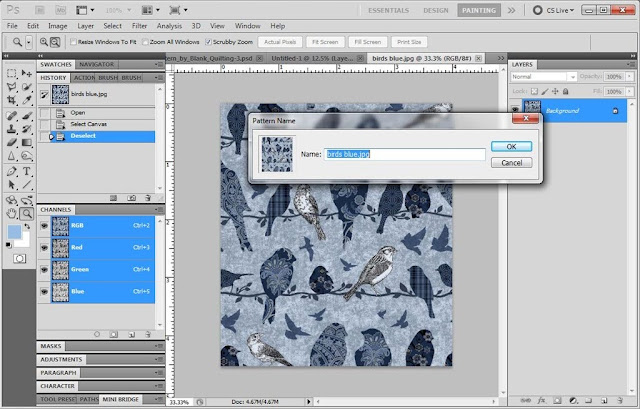
Once all the fabric images are made into patterns, go back to the quilting file in your PhotoShop and click on a layer that you want to add fabric to. Make sure you do not click the mask. Click on the block to the left of the mask. Then click “Edit” then “fill” then select “pattern” and select the fabric image you would like to fill it with.
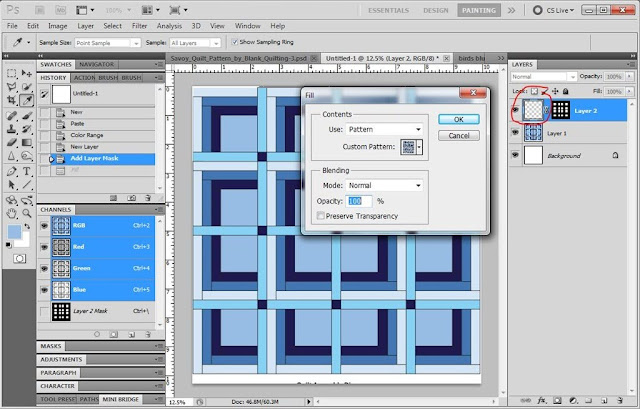
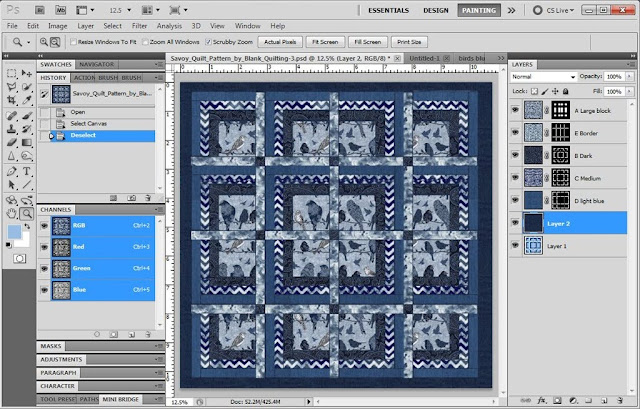
Go through each one until you are satisfied with how it looks. I wanted a border around my quilt, so I made the canvas larger and filled the bottom layer with the fabric (which, in this case, was denim).
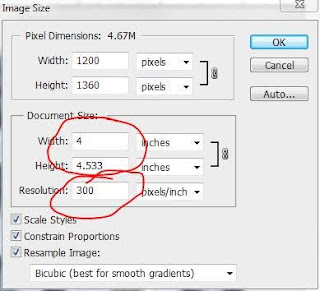
Some of the fabric images were too large or small, so I changed the size of the fabric image, then recreated a pattern with it.
Change the image size by going to “Image,” then “Image Size.” Either change the height and width or the resolution of the Document Size.
Then fill the layer with the new pattern to see how it looks. If it is still not the right size, change it until it is. I deleted the extra patterns that I didn’t need when I went in to fill a layer with a pattern. Right click the pattern you want to delete and select “delete pattern.”
This is how mine looks on screen. I will post later once I have it finished for real.
