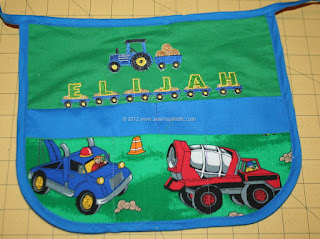
Child’s Tractor Apron
First I cut two 9.5x11.5” green fabric. I also put thick fusible interfacing on one of the pieces to make it more sturdy.
Then I cut a blue piece 11.5x11.5” and folded it in half.
Then I cut one green and one printed piece 4x11.5” and sewed them together at the top, right sides together.
I used a bowl to trace around the corners to round them off.
I embroidered the tractor and name on one piece.
Then, with the blue piece unfolded, I put the printed pocket on top of it and sewed two straight lines to divide the piece into three pockets.
Then, not thinking, I sewed a line for the blue pocket to divide it into two pockets. I only sewed it until I couldn’t go down any further because of the printed fabric. If I were to do it over again, I would sew the pockets the same so that I could just sew right over the top of both print and blue pieces. For instance, both would have two divisions, or both would have three divisions.
Then using my Singer Adjustable Bias Tape Foot, I sewed on the bias tape all the way around except for the top.


