Singer XL400 Embroidery Sewing Machine–Tips and Error Messages
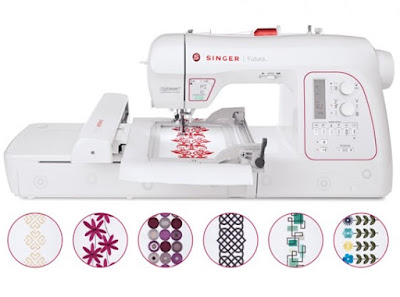
I’ve learned a lot about my Singer XL400 Embroidery Sewing Machine since I wrote my review.
If your thread breaks, runs out, or doesn’t quite catch at the first few stitches because it’s too short (I recommend at least 5 inches of thread for it to catch), normally the machine doesn’t sense it and let you know until at least 8 stitches have past. If you notice it before the machine does, push the Stop button. Otherwise the machine will beep and stop on its own. Then push the Reverse Stich Button as many times as you need to in order to go back to where the stitches left off. If you hold down the button, you will notice that when you release it, it continues to go back for some time. As far as I know, there is no “forward” button if you go back too far. Press the Start button to start stitching.
Oftentimes just gently holding onto the thread at the spool for about 10-20 stitches will stop the beeping. But be careful when you do this, as it may be the machine telling you that the bobbin thread is getting low and if you ignore it too long, the bobbin will run out.
There’s not much you can do about the bulkiness of the design, but by keeping threads trimmed, it will help to minimize the beeping. You can trim the thread on top with each block. Either let it stitch the entire block before snipping the thread, or let it stitch a few stitches, press Stop, snip, then press Start. I like keeping I snipped as I go so that the long threads don’t get stitched over. It’s easier to snip this way.
If you use a laptop and are moving it around, bumping it and whatnot, chances are you will receive this message. It will not stop the current stitching if you ignore it. But if you click “continue”, it will stop. Then you will have to click “Transmit to Machine” and it will ask if you want to continue with the current transmission. I have not figured out if clicking “yes” starts it where it left off or on the NEXT thread change. I messed up a couple designs by not paying attention to this. The thread colors were messed up and there were missed stitches. So the best thing to do is either
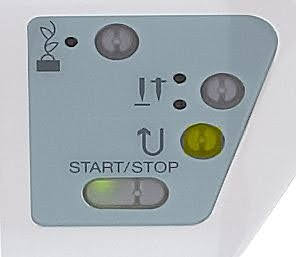
Reverse Stitch Button
One thing that I didn’t know about the XL400, that I had to edit in my review was the ability to “back-stitch” when the thread runs out or breaks. It was frustrating that the thread ran out and there was no way—or so I thought—to go back and re-stitch where there were no stitches. There’s a little magic button on the machine, called the “Reverse Stitch Button” just above the Start/Stop button.If your thread breaks, runs out, or doesn’t quite catch at the first few stitches because it’s too short (I recommend at least 5 inches of thread for it to catch), normally the machine doesn’t sense it and let you know until at least 8 stitches have past. If you notice it before the machine does, push the Stop button. Otherwise the machine will beep and stop on its own. Then push the Reverse Stich Button as many times as you need to in order to go back to where the stitches left off. If you hold down the button, you will notice that when you release it, it continues to go back for some time. As far as I know, there is no “forward” button if you go back too far. Press the Start button to start stitching.
Error 6 – How do I stop that beeping!
Beep-beep, beep-beep, beep-beep. This is the most annoying sound when heard over and over again as I have. Error 6 (with the #6 lit up) is the most common error. It happens for several reasons:- Top thread broke
- Bobbin thread broke
- Tension not right
- Too much bulk and loose threads on the bottom of the design
Oftentimes just gently holding onto the thread at the spool for about 10-20 stitches will stop the beeping. But be careful when you do this, as it may be the machine telling you that the bobbin thread is getting low and if you ignore it too long, the bobbin will run out.
There’s not much you can do about the bulkiness of the design, but by keeping threads trimmed, it will help to minimize the beeping. You can trim the thread on top with each block. Either let it stitch the entire block before snipping the thread, or let it stitch a few stitches, press Stop, snip, then press Start. I like keeping I snipped as I go so that the long threads don’t get stitched over. It’s easier to snip this way.
Connection Error
- ignore it--DO NOT CLICK on “continue” or X it out, but leave it alone and continue changing threads when each block is finished, or
- let it finish the current block then click “continue” or X but DO NOT continue with the current transmission. You will then have to send each block individually as you change colors.


