Using Sizzix eClips on Heat ‘N Bond
I am currently working on a bunch of teddy overalls with teddy appliques and thought it would save some time by using my cutting machine, the
Sizzix eClips 2, to cut out the
Heat ‘N Bond. I asked around and searched google, and nobody had ever tried it, so I thought I’d give it a try. I was very happy to find out that it really does work.
Some things to remember:
1. Make sure you use a new or sharp blade so that it doesn’t tear.
2. Use spray adhesive like
505 Adhesive Spray if your mat loses its stickiness.
3. Place the Heat ‘N Bond with the iron-on side up, and the paper side down.
4. Make sure your paper is cut a little bigger than the area being cut. I like to make it at least 1/4” bigger at the top and bottom.
5. I set my speed to 5, and my blade and pressure at 3. Play around with it on plain paper to find what works best for you.
Find my teddy applique on
etsy and
ebay under cpkdiana.
Download the teddy cutting file
here.
Popular posts from this blog
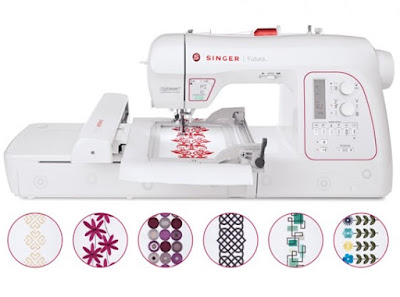
Backstory For the past week I've been reattaching all my photos to each of my posts on some of my blogs due to losing all my photos when I deleted my main account (read about it here .) I ran across the Singer sewing machine reviews that I had done--mainly the Singer 9960 Quantum Stylist --my all-time FAVORITE sewing machine! I had sold it (along with my Futura XL-400 ) 5 years ago and purchased a Singer Futura XL-580 instead. (I figured I could sell two machines and just use one, so I wouldn't be using up so much space in my bedroom.) Since the day I sold it, I've regretted it. I loved that machine. A while back when I had checked to see if they still made them, I found it had been discontinued. I was just curious so I looked again and was surprised that they started making them again! On sale for $500 on singer.com . So since I had sold mine on facebook marketplace years ago, I was just curious if someone was selling theirs....
In my previous reviews for the Singer 9960 Quantum Stylist (click here for review) and Singer Futura XL-400 , (click here for review) I was really excited about the automatic thread cutter that the 9960 has, and was wishing that the Futura had it, too. Well, I got my wish. Most everything that the Quantum Stylist has that I love, the new Futura XL-580 has. So I was quick to purchase it and sell my other machines. I needed to clear out things in my bedroom/craft room/sewing room anyway. I figured since one sewing machine takes up less room than two and since the XL-580 has the previously mentioned features, that I might as well have one machine rather than two. Oh how I was wrong! If you’re looking for an embroidery machine, this one will do, but if you’re looking for a great overall sewing machine, the Quantum Stylist takes the cake.
Today I went to the thrift store to see what they had in crafts and found a bunch of embossing powders and ink. I’ve seen embossed stamps just recently on the web, so I was thrilled to find these. Normally they run around $5 each and I got them for $1.75 each. I was excited to try them out and so were my kids. I don’t have a heating gun, but I looked up online and found that you can use a regular clothes iron for it, so I gave it a try. It worked fine, but some of the paper was sensitive to the heat and curled up a little. All I did was hold the paper above the iron as the iron bottom was faced up. The paper barely touched the iron and it took about 10-20 seconds to heat the paper enough to melt the powder. It didn’t singe or burn any of the paper. Some irons may vary. I used Durathon Electronic Iron by Hamilton Beach. I bought seven different colors, although some colors say the same name but are quite different. They are from different companies, too. Here’s the photos I got of...