Matching Pajamas for Him and His Doll - Butterick B4647
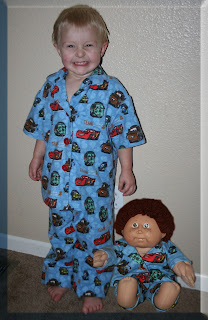
I thought it would be a super cute idea to make my son matching pajamas for him and his Cabbage Patch Doll. It took me a few days to get to the fabric that I’d purchased at Joann’s and he kept asking about his new “nighties”. I finally got around to making them and he absolutely loves them.
Materials:
The fabric I used was Licensed Disney Cars—at Joann’s for $9.99/yard. I of course used my 50% off coupon and bought 3 yards, which was just enough to make Size 3 pjs, doll pjs, and a pillow case.
The pattern I used for my son was Butterick B4647, which I got on sale for one or two dollars. I used size 3 which ended up being way too big. According to the measurements, that was the correct size to use, but these pjs will fit him for a couple years. I had to take up the bottom seam of the pants and baste it so that when he grows I can simply take it down.
The pattern I used for the doll was from a vintage Cabbage Patch Book Designer Clothes Pattern Book, Plaid #7686 that I got on ebay for like $3.
Tools used (everything I purchased at 50% off with Joann coupons, except the machine and buttons):
- Friskars Mat and Blade Set
- Fabric Scissors
- Mark-B-Gone Tracing Paper—A total life-saver!
- Ergonomic Tracing Wheel-Serrated
- Dritz® Fine Point Disappearing Ink Markers
- Seam Ripper that came with my sewing machine
- 6 Buttons that I purchased in bulk with like 100 buttons for $5 with a $5 off Joann coupon, so I got them free.
- Pellon 906F Sheer Fusible Interfacing, White
- 1/2” elastic and safety pin to work the elastic through the casing
- Thread
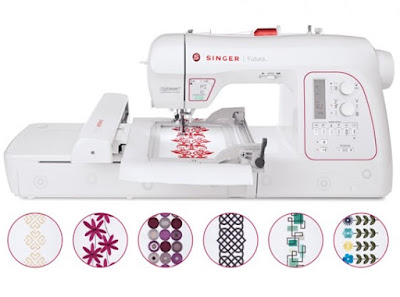
- My sewing machine which I love!—Singer Quantum Stylist 9960
- Universal Machine Needle
- Iron and Ironing Board
- Pinking Shears
(not all items are pictured)
Okay, lets get started!
The first step of course is to cut the fabric. I held down the pattern with anything within reach.
Then I put the Mark-B-Gone Tracing paper between the fabric and pattern.
And used the wheel to trace over the lines of the pattern. This way is so much easier for large patterns. This is a MUST for patterns with different sizes on one piece, such as this one. For small patterns, like doll clothes, I just put the pattern over the fabric and trace around it with the Disappearing ink pen.
All the pieces cut out. When using a fabric with a design that goes one-way, make sure you put the patterns in the correct position.
Iron on interfacing as directed.
Using 5/8” as noted on the pattern directions, sew the front and back pieces at the top and sides.
Staystitch the neck edge. Staystitching is simply sewing within 1/8” from the seam (1/2” from edge) to help keep the fabric’s shape when you sew other pieces together.
Stitch collar sections together, leaving notched edge open. Trim.
Turn right side out. Press. Baste raw edges together.
Pin collar to neck edge, clipping garment neck edge where necessary. Baste, keeping pressed edge free.
Finish long unnotched edge of front facing. I used my Overlocking Foot with an overlocking stitch.
Staystitch neck edge above large circle. Turn 5/8” seam allowance on should edge; press.
Pin front facing to front opening and neck edges, clipping facings where necessary. Stitch, keeping pressed edge of collar free. Turn facings to inside. Press seam toward collar between clips. Slipstitch by hand pressed edge of collar and facings over seams. If you don’t know what slipstitch is, I highly recommend Lorna Night’s book, “The Sewing Stitch & Textile Bible”.
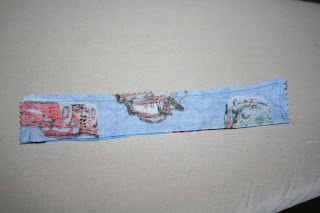
Stitch sleeve seam, sides together. I used a short sleeve. In the photo, the top where it is stitched is the sides, the straight edge is the end of the sleeve, the curved edge is where it is to be stitched to the front/back piece of the shirt.
With right sides together, pin sleeve into armhole, matching notches, small circles and seams, placing large circle to shoulder seam. Adjust gathers. Baste. Stitch. Stitch again 1/4” away in seam allowance. Trim seam allowances close to stitching. Press seam allowances flat. Turn seam allowances towards sleeves.
This may seem very confusing. What I did is match up opposite ends of centers with the pieces because the sleeve is larger than the area where you stitch it to the shirt. Then you can pin/gather the sleeve and baste. When you paste, you will need to poke some of the sleeve through the machine to help gather it. Basting is very important in this step because it is easy to rip out if you mess up. Use a 5mm stitch length when you baste.

Turn up a 1 1/4” hem on lower edge of sleeve turning in 1/4” on raw edge. Press. Baste close to upper edge. Stitch along basting. I added an extra step and edgestitched 1/8” from the edge.

Turn lower edge of facing to outside along seam. Stitch across facing 1 1/4” above raw edge. Trim. I finished the edges with a overlocking stitch and pinking shears.


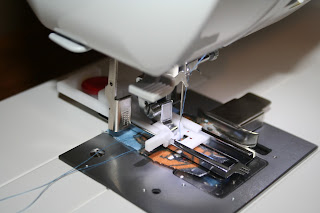
Now for the fun part. The buttons!! I always used to think that I would never use my button sewing foot or Buttonhole Foot, but when I tried it out on a fabric scrap (which I highly recommend doing), I was amazed at how easy it was to use.

Make button holes on left front at pattern markings. Lap left front over right, matching centers. Using buttonholes as guides, make button marking on right front. Sew buttons to right front at markings. I found out that the buttonholes on my machine begin at the top. I traced around the button with disappearing ink, then lined it up that way.

And you’re finished with the shirt.

The pants are SO MUCH EASIER! For each pant leg, stitch one front and back section together at inner leg.

With right sides together, place one pant leg inside the other. Stitch center seam. Stitch again 1/4” away in seam allowance between notches. Trim close to second stitching.
This may seem very confusing. What I did is match up opposite ends of centers with the pieces because the sleeve is larger than the area where you stitch it to the shirt. Then you can pin/gather the sleeve and baste. When you paste, you will need to poke some of the sleeve through the machine to help gather it. Basting is very important in this step because it is easy to rip out if you mess up. Use a 5mm stitch length when you baste.

Turn up a 1 1/4” hem on lower edge of sleeve turning in 1/4” on raw edge. Press. Baste close to upper edge. Stitch along basting. I added an extra step and edgestitched 1/8” from the edge.

Turn lower edge of facing to outside along seam. Stitch across facing 1 1/4” above raw edge. Trim. I finished the edges with a overlocking stitch and pinking shears.


Now for the fun part. The buttons!! I always used to think that I would never use my button sewing foot or Buttonhole Foot, but when I tried it out on a fabric scrap (which I highly recommend doing), I was amazed at how easy it was to use.

Make button holes on left front at pattern markings. Lap left front over right, matching centers. Using buttonholes as guides, make button marking on right front. Sew buttons to right front at markings. I found out that the buttonholes on my machine begin at the top. I traced around the button with disappearing ink, then lined it up that way.

And you’re finished with the shirt.

The pants are SO MUCH EASIER! For each pant leg, stitch one front and back section together at inner leg.

With right sides together, place one pant leg inside the other. Stitch center seam. Stitch again 1/4” away in seam allowance between notches. Trim close to second stitching.
Again, I edgestitched and pinked.
And you’re finished!
For the doll clothes, I started with the pants first. Sew the pant leg edges together. Front and back pieces are identical, so you will do this for both sides.
Turn up a 1 1/4” hem on lower edge of pant legs turning in 1/4” on raw edge. Press. Baste close to upper edge. Stitch along basting. I added an extra step and edgestitched 1/8” from the edge.
Stitch pant leg together as shown.
Follow the same steps to sew them together and casing/elastic as with the children’s pjs. Use 1/4” elastic.
Stitch the collar pieces together right sides together, leaving the bottom open.
Turn right side out and press.
Fold in open one edge of collar 1/4” and press.
This is a tricky part. Pin the collar to the shirt with the unfolded side and sew.
Line up folded side of collar to shirt and slipstitch.
Turn up a 1 1/4” hem on lower edge of sleeve turning in 1/4” on raw edge. Press. Baste close to upper edge. Stitch along basting. I added an extra step and edgestitched 1/8” from the edge.
Stitch sleeve to shirt then stitch sleeve and shirt seams right sides together. Sew buttons on.
And you’re finished!
*This is the first time making something like this. I am rather new to sewing clothing.


.JPG)


